Wednesday, 7 December 2016
What I would do for christmas holiday.
I will produce a one minute or more video with the song, Ex's & Oh's by Ella kings and display skills gained from six years of video editing and post it on YouTube and with a link on my blog, using the shows 'Haikyuu', 'Noragami' and 'Kuroko No Basket' while trying very hard to not succumb to laziness.
Friday, 2 December 2016
Animation
This post is basically, me trying to animate at last.
A couple of days ago, I made a background that my character or character may move in.


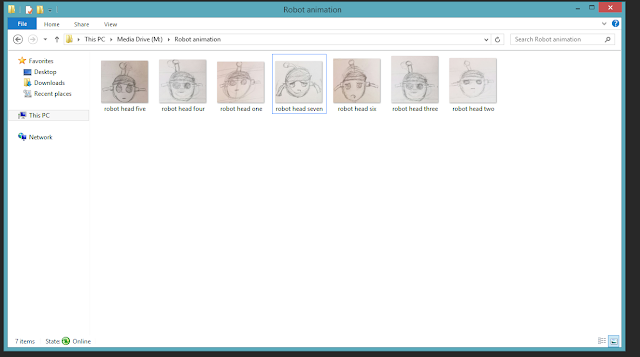
Now I'm going to chop all these faces up in separate images and save it on my 'M Drive.'
 Now i'm going to input this in Adobe premier pro since I'm not so sure about using After effects for an animation.
[ 5 minutes later]
Well... Adobe premier pro apparently refuses to work, so after effects it is!
And by some miracle it worked!
I couldn't resist, doing another animation, however instead of drawing each frame separately, like the first one, I made the animated part a separate part.

Week 1: I had set myself a goal of production a bouncing ball, I managed to make one in under an hour.
To make this work, I created a green circle and than duplicated the object over 12 times into 12 separate layers. each circle was moved slightly in some way, I made sure each of them overlapped each other.

I than exported them all into Adobe Affects since I don't have my laptop with me so I had settle from the program, I than made sure each of the 'assets' inputted into the program was 2 frames long and re positioned and resized all of them, to what you see below.

https://www.sendspace.com/file/7u8nfv
Today I tried to Illustrator to gets used to it.


Sack
made in Photoshop but put together in after effects.

Audio Link: https://www.freesound.org/people/acclivity/sounds/20010/
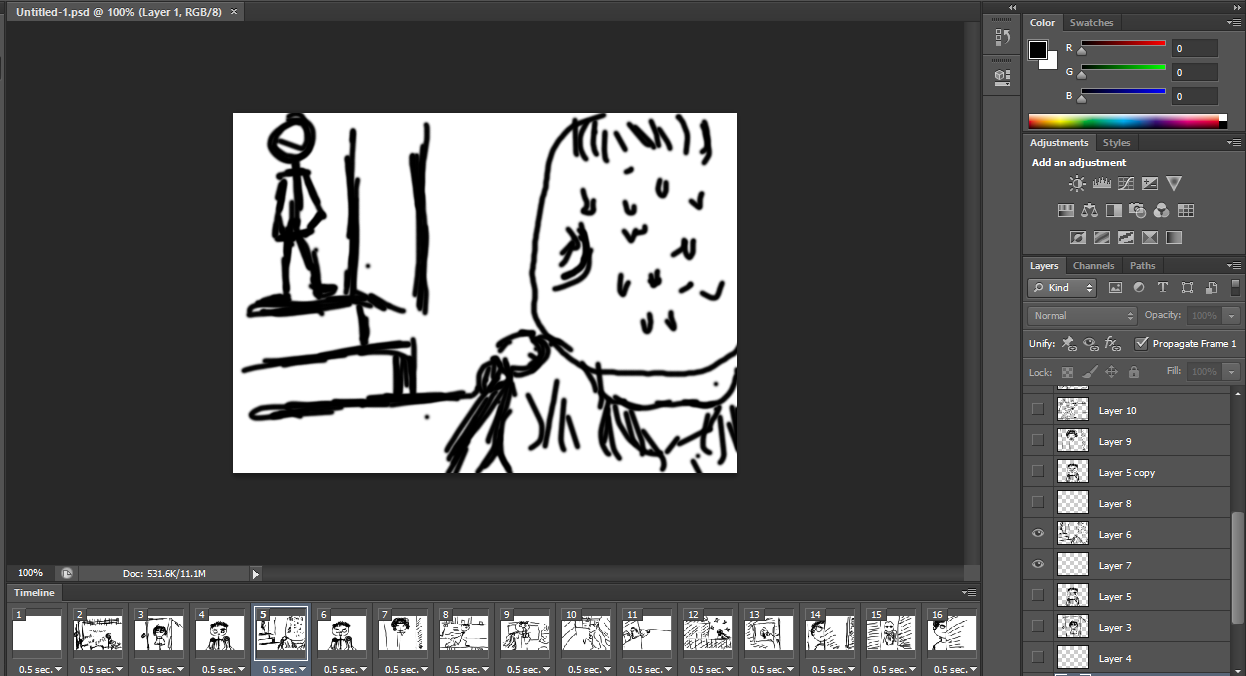
Stick Man walk cycle- 24 frames per second


How I made it appear that several things were moving at once was through layering in photoshop, I've recentally discovered that I can render my animation in the software and the file sizes are so much smaller than when I render in After effects.
The key to this method was manipulating the layers and changing the frames in the time line.

In total there are 14 frames but 39 layers, a small portion of the animation were things that didn't move while the rest were pieces that should appear to be moving.
I was than told to make both my ball and dragon appear solid, I spent time filling in both of them in white in certain frames.
A couple of days ago, I made a background that my character or character may move in.

I didn't really have a vision for this but I wanted it to look nice, I was inspired by a simple animation shown to me on YouTube.
I started to draw a series of faces that I wanted to animated, it's in Photoshop.


[ 5 minutes later]
Well... Adobe premier pro apparently refuses to work, so after effects it is!
And by some miracle it worked!
I couldn't resist, doing another animation, however instead of drawing each frame separately, like the first one, I made the animated part a separate part.

And than isolated the face and placed several different eyes on it, all together there were there pictures to produce the overall animation.
Assignment for animation
Week 1: I had set myself a goal of production a bouncing ball, I managed to make one in under an hour.
To make this work, I created a green circle and than duplicated the object over 12 times into 12 separate layers. each circle was moved slightly in some way, I made sure each of them overlapped each other.

I than exported them all into Adobe Affects since I don't have my laptop with me so I had settle from the program, I than made sure each of the 'assets' inputted into the program was 2 frames long and re positioned and resized all of them, to what you see below.

I than render it all into what you see below, again because I'm using after effects the file is much larger than I would have liked so I have to provide a link to Send space.
I found a new way to reduce the memory consummation using Photoshop.
https://www.sendspace.com/file/7u8nfv
Today I tried to Illustrator to gets used to it.

These are just some rough sketches that I found myself drawing around one of Robot drawings in Illustrator.
I've noticed that my drawings now have more personality than when I first start college.
I just realised this isn't really clear, so I took a screen shot and it came out much better.

made in Photoshop but put together in after effects.
Scenes used in the animation.

Sack walk cycle.
Audio from the site 'FreeSound.org'
Audio Link: https://www.freesound.org/people/acclivity/sounds/20010/
Stick Man walk cycle- 24 frames per second
Stick Man Walk Cycle- 12 frames per second
The door-12 frames
Swing
This is my first animation that I rendered both video and sound in together.
Already I had my video but without the sound but the file was so big that there was no chance that I could post it on my blog, add music to it and I might as well post it on YouTube and provide a link to it.
So how I went to work on reducing the file size of the video, I rendered the video again in after effects but in a Jpeg sequence to a distend file of my choosing which I called 'swing' and than one by one, I imputed each image into Photoshop, each time I drop an image in, a new layer would appear.

I than opened up a timeline, and made sure the timeline I was opening was a frame by frame timeline and not a video one, I've now worked in both options and can now tell the difference.
This is what a frame timeline looks like.

With each new image, a new frame was created and I had to hide and display layers to give the illusion of movement.
I made sure that my image size was 1280x720 and that the resolution was 72 so it wouldn't consume unnecessary space on my drive before I rendered it.
But I was far from down, this is where the video timeline came into place.
Once my video finished rendering, I created a new photoshop file and when I opened the timeline, it was set to video instead of frames.
I downloaded some sound from Freesound.org, a website that I was introduced to, last year for TV and film and placed both the video and sound into the timeline, by now, I'm virtually a pro in the art of the video Timeline so it was simple to bring the two gather into one final video.

Today I tried my hands at Layering.
Here this is slow down of the video to 0.2 per frame.
The key to this method was manipulating the layers and changing the frames in the time line.

In total there are 14 frames but 39 layers, a small portion of the animation were things that didn't move while the rest were pieces that should appear to be moving.
I was than told to make both my ball and dragon appear solid, I spent time filling in both of them in white in certain frames.
Than I went to explore Youtube animation video's for inspiration on the colour scheme for the dragon and ball.
Climbing and Falling.
This was taken from a Disney music video called- Mulan: Be a Man, I downloaded the video and than cut out anything I didn't need and focused on one scene and rendered that scene as a TIFF sequence, I than used that a reference.
Conflicted without sound.
Conflict with sound
34 Images all together.
Sound: https://www.onlinevideoconverter.com/success?id=e4e4h7a0d3a0f5j9e4
Origanal clip: https://www.youtube.com/watch?v=NhTT3jX343M
Animation Reel Final Project:

https://simkl.net/episodes/27/2731568151970db6d_w.jpg

http://images5.fanpop.com/image/photos/25000000/Facing-the-wind-the-amazing-world-of-gumball-25060558-588-339.png

https://s-media-cache-ak0.pinimg.com/originals/41/82/d9/4182d90b18f72652db135acddac883ce.jpg
Than I tried to capture the style of the amazing world of gumball, by getting a random image off the internet and sticking my 2d character in it, based off my script.
 Once I had my script finished, I printed it out and what through each scene and made some changes to cut down on the time the whole animation will be.


I than using a 3d camera in after effects made it into a 3d space and inputted my 2d animation into is and made the background it's own thing so it moves.
And this is what it looks like put all together.

This is what I produced from it, without the main text.

By this point I was running out time. My brain went to work on how to make a certain scene look effective without actually animation my character and that's when I thought I would do it from my characters point of view.

I than got an image of a supermarket online and made an animation out it, each frame was 'pinched' and zoomed in just a little bit more, plus add in some brightness change and an overlay to make a cartoonist effect.
I was pretty happy with the end result.


 Full animation:
I finally got figures to help me with body poses.

Origanal clip: https://www.youtube.com/watch?v=NhTT3jX343M
Animation Reel Final Project:
Big animation Project:
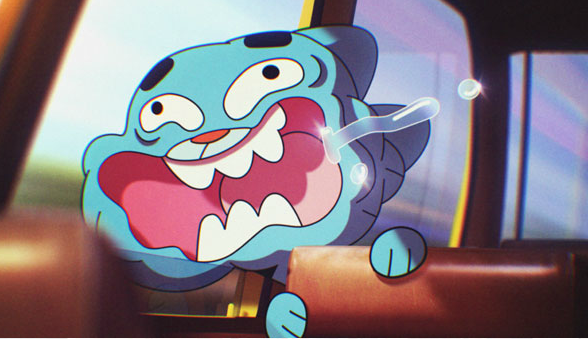
I love the look of the amazing world of Gumball so I decided to do an animation like the show, here are some screen shots from the show:


http://images5.fanpop.com/image/photos/25000000/Facing-the-wind-the-amazing-world-of-gumball-25060558-588-339.png

https://s-media-cache-ak0.pinimg.com/originals/41/82/d9/4182d90b18f72652db135acddac883ce.jpg
Than I tried to capture the style of the amazing world of gumball, by getting a random image off the internet and sticking my 2d character in it, based off my script.


Animatic Storyboard
I produced the storyboard in Photoshop and I plan to put it all together in Sony Vegas pro with the sounds I recorded from my phone and off the internet before finally rendering it all out in photoshop to put on this blog.
The making of the running scene

I was planning to use photoshop for my animation. First I made my character than googled a run cycle.
I was copying and pasting layer and layer after with each new frame, and hiding layers to produce the final running cycle.
But I am far from done.
I now have to find a cape blowing in the wind cycle for my character.
(20 minutes later)
There is no cape blowing cycle like the ones that detail the run cycle, so I pretty much had to guess and this time, I didn't use shapes for the cape, and draw it on.

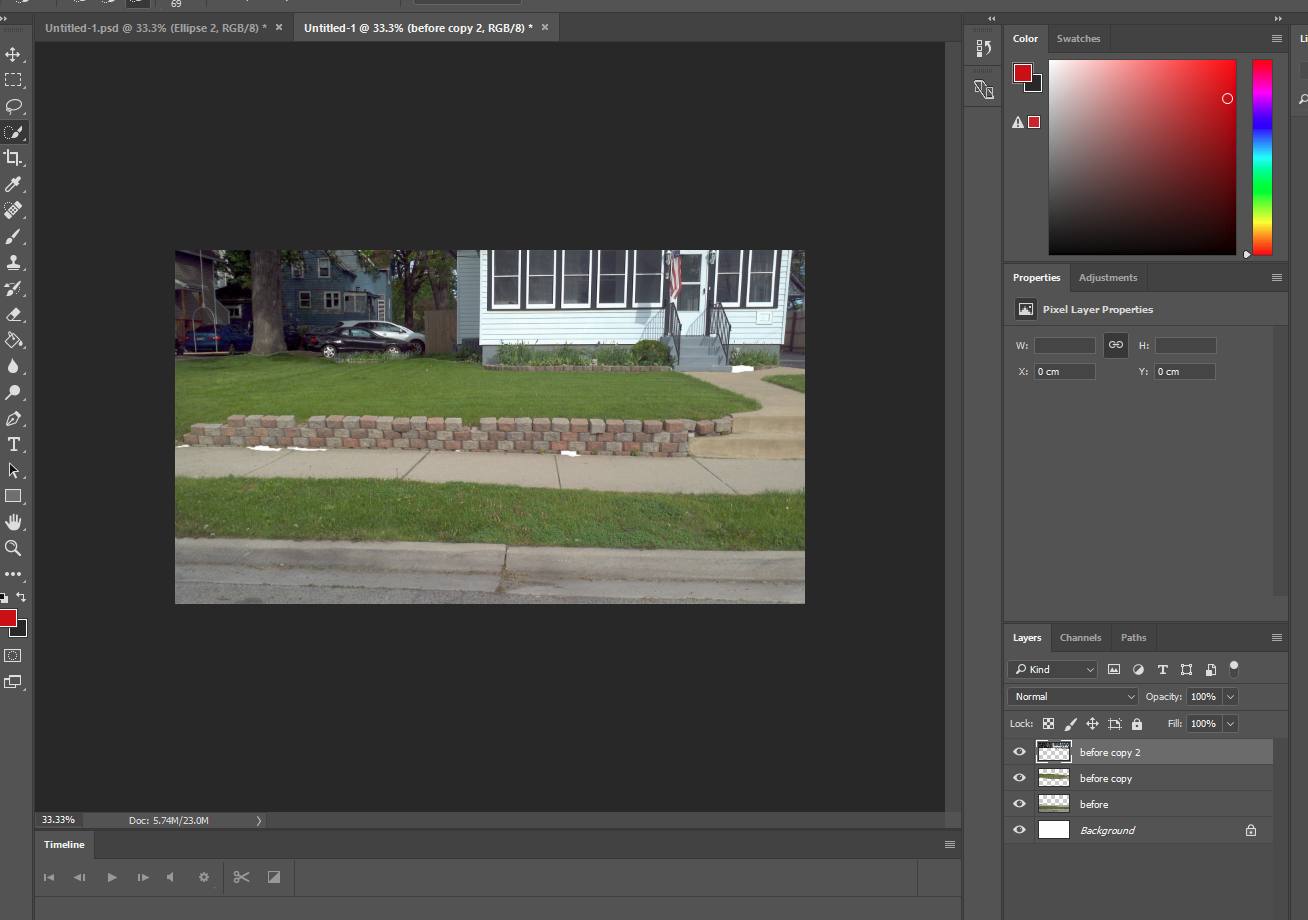
Now that my animation is rendered, I need to input the background however i haven't done the background so I have to make due with an image of the internet and split that image into three separate layers off in Photoshop before bring it all together in after effects.
I also rendered it close up.
I had to tweak the camera in after effects before rending it and than rendering it again in Adobe Photoshop to reduce the file size.
I than started to do the intro, I really liked the fairlyoddparents episode title, I would this image as a reference.

This is what I produced from it, without the main text.

Here is the link to the tutorial I used to create the spotlight.
And here is the full video compressed:
By this point I was running out time. My brain went to work on how to make a certain scene look effective without actually animation my character and that's when I thought I would do it from my characters point of view.

I than got an image of a supermarket online and made an animation out it, each frame was 'pinched' and zoomed in just a little bit more, plus add in some brightness change and an overlay to make a cartoonist effect.
I was pretty happy with the end result.
I than tried my hand at lip syncing, I made the mouths and the everything in Photoshop and than I exported it into Ae with the sound, I recorded.
This is the image I did in Photoshop.

This idea actually came to me, when I recalled 2016 Ben 10, and even though the show was okay and nothing special. I couldn't help but notice how expressive the character's were.


I split my photoshop file into layers and exported it into AE, the king of piece by piece animation.

I recorded the sound in the basement of the building and I had replaced my original audio with my new one. This time there was some variety between both characters (Boyfriend and Girlfriend) and boy, did it take me a long time to get the lips to match and to make everything else move.
But when I was happy with it, I rendered it out and the file was absolutely huge because the file had so many pieces moving, so I had to than render it in Photoshop after I did it in AE.
This was the point, where I added an overlay in Photoshop before rendering the final image, since it seemed to plain for me.
For one of my scene's I researched funny cartoon facial expressions.

To create this is Photoshop.


Evidence for the Group-game
As you probably would have guessed, I am one of the two concept artists for my group.
The group is doing a trailer for a game that we don't have time making,so we had to spring for the next best thing.
Our trailer is based off on an island environment, and I was tasked with producing concept designs that were tropical based.
At first, I was tasked to look at a Japanese houses, especially the wooden one's.

As you can see, there were some interesting designs I stumbled upon when looking at Japan, by the third drawings I stopped coping what I saw on the screen and do a free-draw, taken from a little bit of gathered knowledge that I had acquired from looking at passed images. The last drawing, I draw showed me that houses didn't have to follow the typical design and can be quite creative... that and anything looks good in white.
I submitted this image to our group Google Hangout group, this is basically something that lets us all stay in contact with each other, even out of class and submit work to each other.
I was than, asked to produce several images of a Palm tree, so I want to research several images of palm trees and this was the end result.

While I was drawing, I realized that that the outline of palm tree is actually incredible simple, especially when it comes to the leaves, without my knowledge, I started using this technique that I developed years ago back in secondary school in Art class, I had complete forgotten about it until I started to draw these palm trees.
I uploaded this onto Google Hangout, and than I was asked to draw some tropical houses, to me it was a sign that the group was starting to get the feel of what they actually wanted, so I started moving away from the basic Japanese house and into a more tropical based environment.

This was my first drawing and I will be straight with you.
I was complete dissatisfied with the end result, at first I thought that I could get away with drawing buildings just by sketching, after all, it had worked pretty well with the other buildings I had done in the past, only for this drawing to prove me wrong.
So very wrong.
My teammates were satisfied with it, while I was not, I was half tempted to rip out the page and start a new but I didn't.
The next image was a sketch of me exploring a more open world.
 As you can see, everything is reduce to very simple shapes, I didn't go into an untold amount of detail when I produced this and made lots of interesting lines, it was quiet fun to produce something not as detail as my previous drawings, where I could be more free with my line work.
I than moved on to more building work, praying that I had improved and it wasn't as bad as my first one.
 This was me, exploring the idea of booth made out of wood, I've seen a lot of food stands and booths in the past. I even modeled a wooden bucket in the past for Game development, which really helped with the wooden planks. I also noticed a change with my shading technique, how I didn't shade so heavily when it came to the bottom two.
But I was still very dissatisfied with my work, I wondered how I could make my buildings and drawings look more realistic, and that's when I remembered several YouTube tutorials that I looked up in my second year of animation in the past. I noticed that all the professional drawers used a ruler and made a dot, where the lines would start from and their drawings will develop from that.
It was actually the same as what I learnt in Herbert lesson on prospective recently, and i thought why not, try to adding this to my drawings? After all, if professional drawers were saying the same thing that Herbet, than they had to know what they were talking about.
I tried this out once years back and it didn't go so well for me. so I was a bit weary of trying my hand at it again.
After all, what was the worst that could happen?


 The bottom was a lot more sketch based but I did use ruler to map out my boat shape, I can defiantly see the improvement in my drawings.
So from now on, I'm going to use a ruler more often, especially when it comes to objects.
The group is doing a trailer for a game that we don't have time making,so we had to spring for the next best thing.
Our trailer is based off on an island environment, and I was tasked with producing concept designs that were tropical based.
At first, I was tasked to look at a Japanese houses, especially the wooden one's.

As you can see, there were some interesting designs I stumbled upon when looking at Japan, by the third drawings I stopped coping what I saw on the screen and do a free-draw, taken from a little bit of gathered knowledge that I had acquired from looking at passed images. The last drawing, I draw showed me that houses didn't have to follow the typical design and can be quite creative... that and anything looks good in white.
I submitted this image to our group Google Hangout group, this is basically something that lets us all stay in contact with each other, even out of class and submit work to each other.
I was than, asked to produce several images of a Palm tree, so I want to research several images of palm trees and this was the end result.

I uploaded this onto Google Hangout, and than I was asked to draw some tropical houses, to me it was a sign that the group was starting to get the feel of what they actually wanted, so I started moving away from the basic Japanese house and into a more tropical based environment.

This was my first drawing and I will be straight with you.
I was complete dissatisfied with the end result, at first I thought that I could get away with drawing buildings just by sketching, after all, it had worked pretty well with the other buildings I had done in the past, only for this drawing to prove me wrong.
So very wrong.
My teammates were satisfied with it, while I was not, I was half tempted to rip out the page and start a new but I didn't.
The next image was a sketch of me exploring a more open world.

I than moved on to more building work, praying that I had improved and it wasn't as bad as my first one.

But I was still very dissatisfied with my work, I wondered how I could make my buildings and drawings look more realistic, and that's when I remembered several YouTube tutorials that I looked up in my second year of animation in the past. I noticed that all the professional drawers used a ruler and made a dot, where the lines would start from and their drawings will develop from that.
It was actually the same as what I learnt in Herbert lesson on prospective recently, and i thought why not, try to adding this to my drawings? After all, if professional drawers were saying the same thing that Herbet, than they had to know what they were talking about.
I tried this out once years back and it didn't go so well for me. so I was a bit weary of trying my hand at it again.
After all, what was the worst that could happen?

I was in shock.
I couldn't believe the difference using a ruler made to my drawings, when I compared these two to my previous drawings, there was such a large difference between them.
Who would have though that using a ruler made my current drawings look a lot more 3D and it add the realism that I didn't know I could achieve until that moment.
By this point, I was looking at my ruler like it was heaven sent.
I started to realise why people used a blue pencil before going over it in ink, a blue pencil was there for sketching while ink was to make it look very nice and final.
It was the same when it came to ruler, it made the final image look very nice compared to what I would have been if it was all sketched out.
From that moment on, I wonder what would happen if i used two prospective lines to create one single image and this was the result.

It certain turned out better than when I last attempted a two pointed prospective, official drawing, the lines provided me with a much more accurate shape for the hammock, at that moment, I felt like a took a huge step forward on my road to becoming an animator in the drawing department, and the next drawing I did, proved me correct.
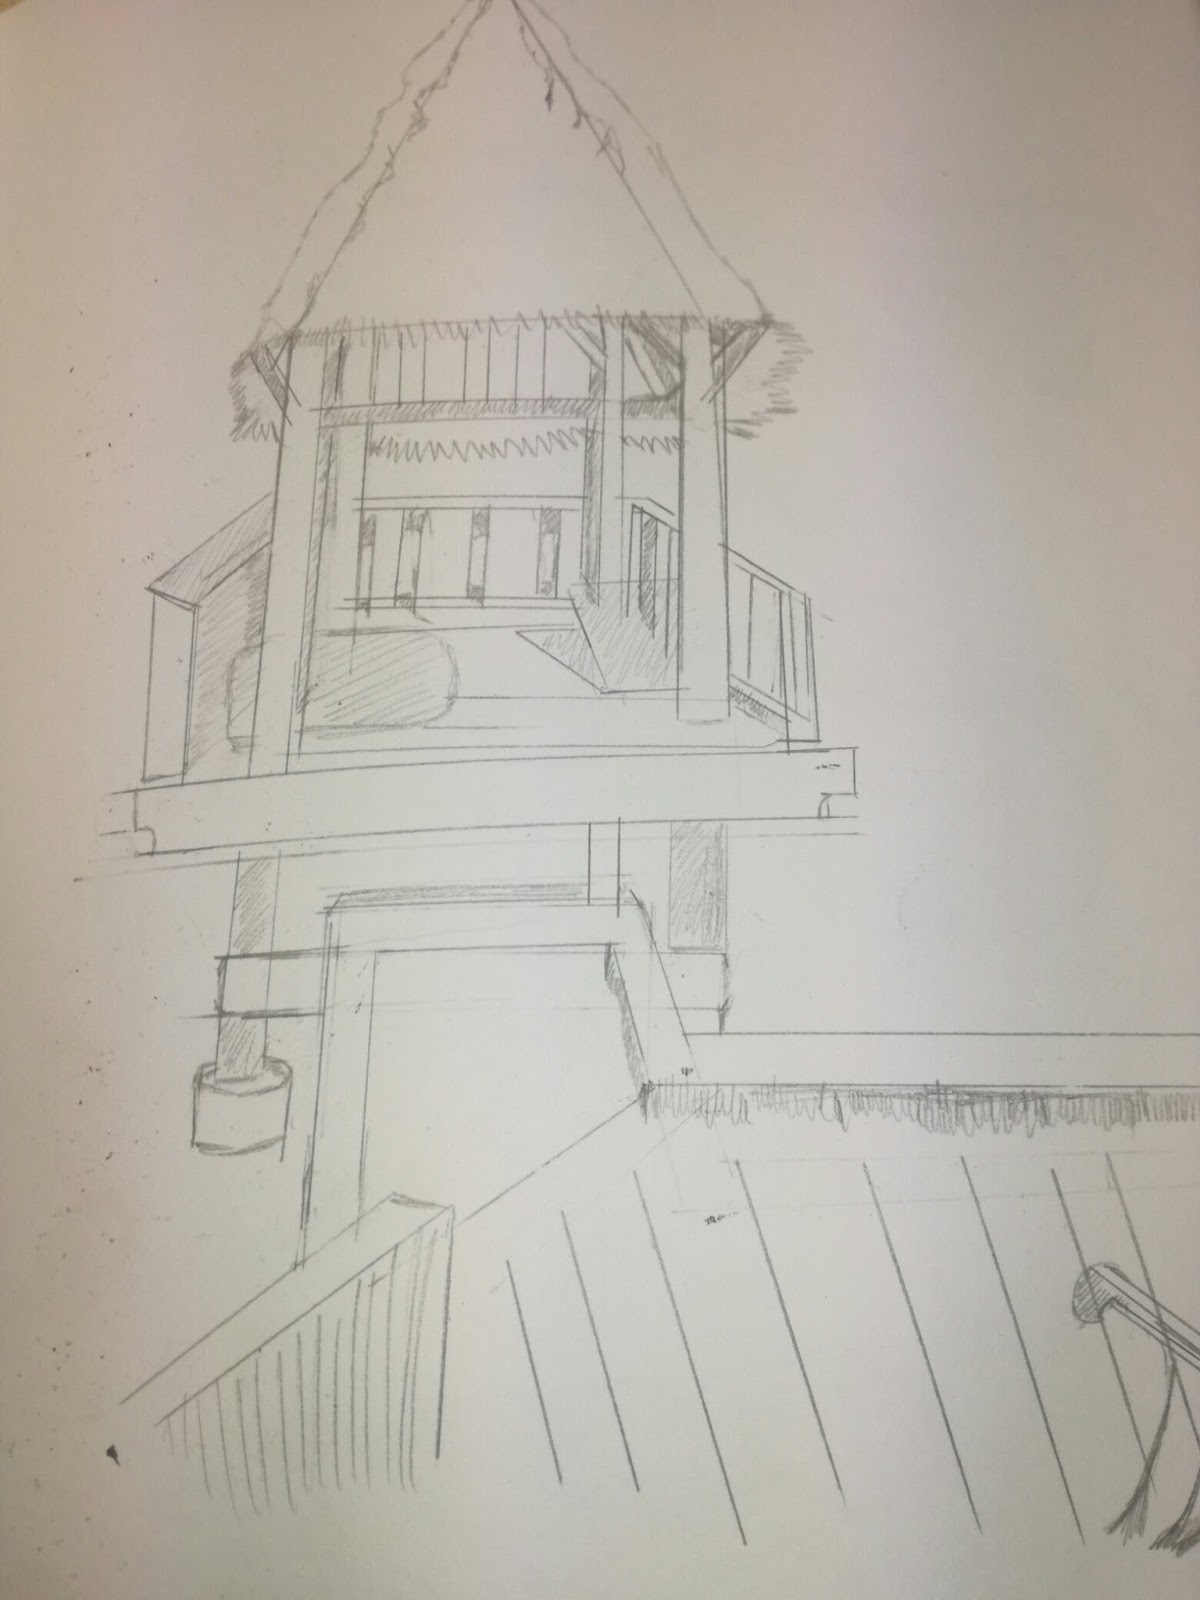
This drawing, confirmed to me, that I should be using a ruler from now on, that and I need to seriously learn how to scan my images into the machine, I've seen the difference and it would be nice to have several scanned images appear on my blog because the line work is much bolder compared to when I take pictures straight from my phone.
Now armed with a ruler and rubber, I was than tasked to draw boats.

So from now on, I'm going to use a ruler more often, especially when it comes to objects.
Subscribe to:
Posts (Atom)